Help Desk Guide
This guide provides step-by-step instructions for resolving common technical issues faced by students, staff, and faculty. It includes how-to documents, troubleshooting procedures, and service workflows for devices, accounts, and everyday IT support.
Ideal for: Frontline tech staff, teachers needing quick answers, and anyone submitting or resolving help desk tickets.
Devices
Printer Installation Steps
- Step 1)
Connect to Faculty Wi-Fi (pwd: sssaventina34)
- Step 2)
Click Windows/Settings/Bluetooth&devices/Printers&scanners
- Step 3)
Click on Add Device
Windows will scan the network and should find two network printers:
RICOH IM 5000 [583879925BBA] - Outside Faculty Room
RICOH IM 5000 [583879925EB6] - Outside Classroom 1-1
- Step 4)
Select the printer and print a test page.
If the test page does not print, open a ticket and IT Support will assist you
Support Process
Help Ticketing and Workflow
How To Create A Ticket
In order to access our ticketing system, you have two options:
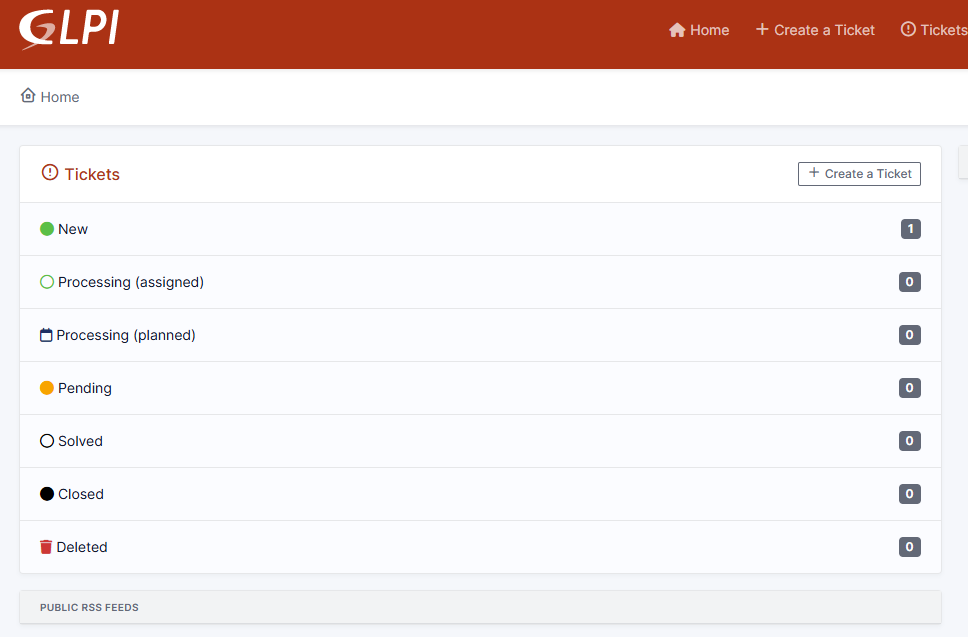
Option 1: Via Web Browser You may go to: https://support.sssrome.it When you go to the address, you should be greeted with the screenshot below
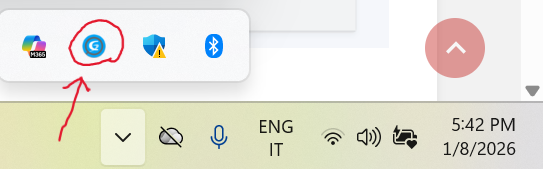
Option 2: Via Windows Taskbar (Quicker) You can also access it directly from the bottom bar of your computer, without typing the address.
-
Click the small arrow (^) in the bottom-right corner of the screen (system tray).
-
Look for the GLPI icon and click on it.
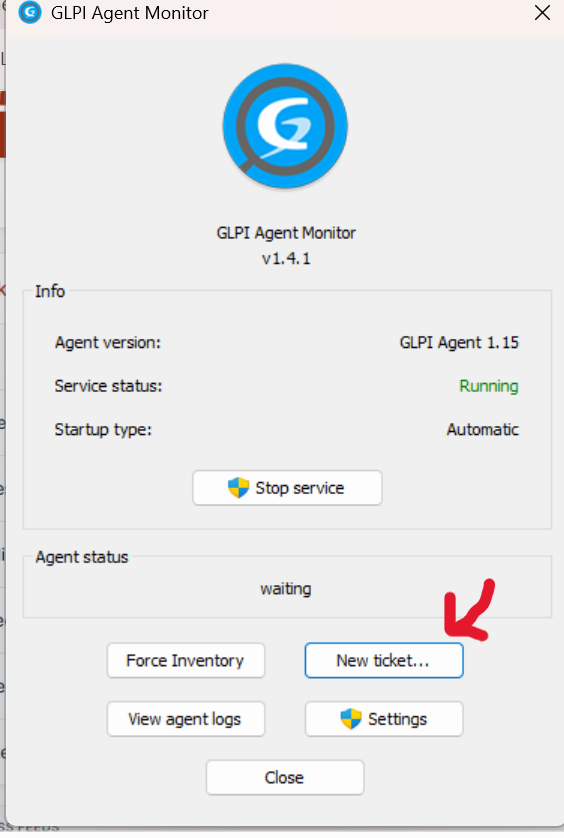
Note: If you do not see the GLPI icon in the menu, please contact the IT Department at support@sssrome.it so we can verify your installation.
---------------------------------------------------------------------------------------------------------------------------------------------
-----------------------------------------------------------------------------------------------------------------------------
How to Log In:
On the login screen, please enter your credentials as follows:
-
Username: Your email address without
@sssrome.it(e.g., justalessio.ronca). -
Password: The same password you use for your Google/Email account.
-
Login Source: Please ensure the dropdown menu is set to GOOGLE LDAP - SSSROME (this is usually selected by default).
Click "Sign in".

------------------------------------------------------------------------------------------------------------------------------------------------------
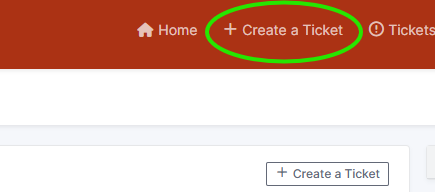
Creating a New Ticket:
To submit a new request, simply click on Create a ticket located in the top menu bar.
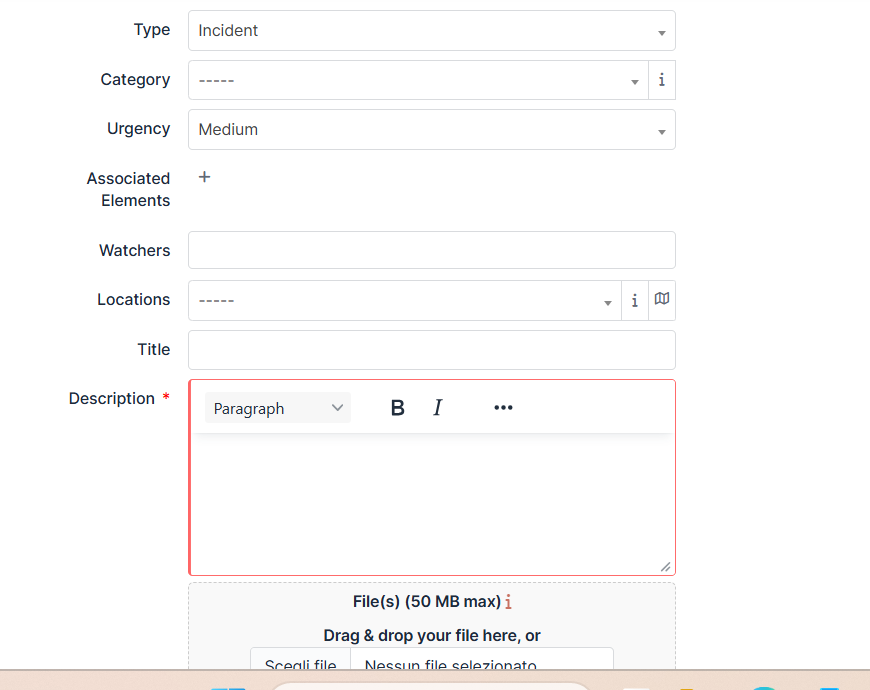
Filling out the details:
On this page, please complete the following fields:
-
Category and Location (Select from the menu).
-
Room number.
-
Description of the issue.
Adding Watchers (Optional): In the Watchers field, you can add any colleagues you wish to keep updated on this ticket (e.g., a co-teacher or supervisor).
-
Note: Ensure there is a bell icon 🔔 next to the Watcher's name. This confirms that the system will send them an immediate email notification.
Submitting the Request:
Once you have filled in the details, click on the Submit Message button at the bottom of the page.
What happens next? You will receive an automatic email confirming that your ticket has been created. A member of the IT Department will review your request and get in touch with you shortly.
Service Level Agreement Expectations
What It Typically Includes:
-
Response Time
How long it takes for the IT team to acknowledge a request or support ticket (e.g., “All tickets will receive an initial response within 1 business day”). -
Resolution Time
How long it should take to fix the issue, depending on the severity (e.g., “Critical outages will be resolved within 4 hours”). -
Priority Levels
Issues are often categorized by urgency:-
? High: Network down, system-wide outages
-
? Medium: Device issues affecting a single user
-
? Low: Non-urgent requests or general inquiries
-
-
Support Hours
When help is available (e.g., Monday–Friday, 8:00–16:00) -
Communication Expectations
How users will be updated (e.g., email updates, portal messages)
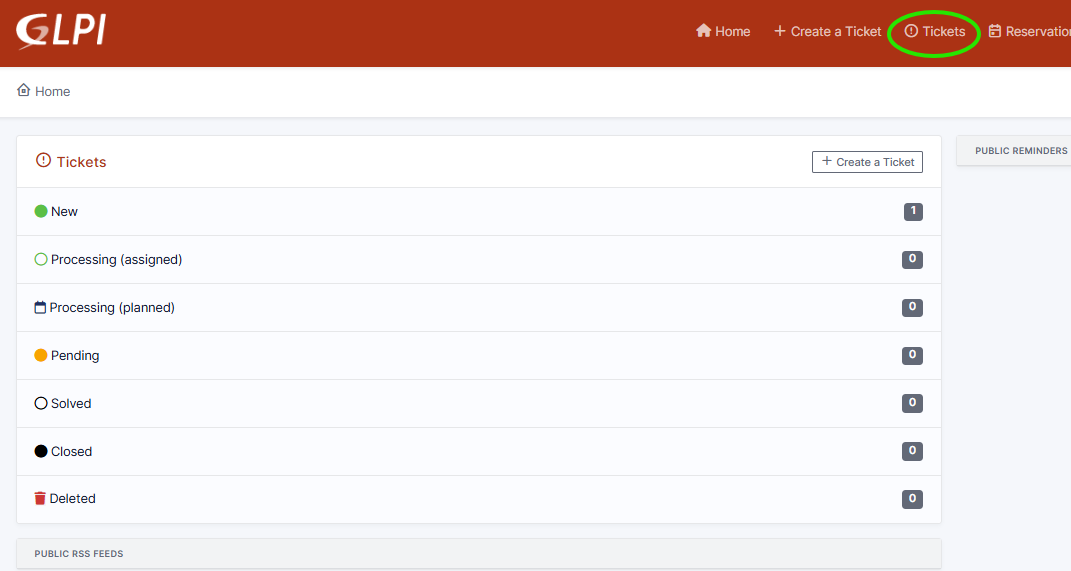
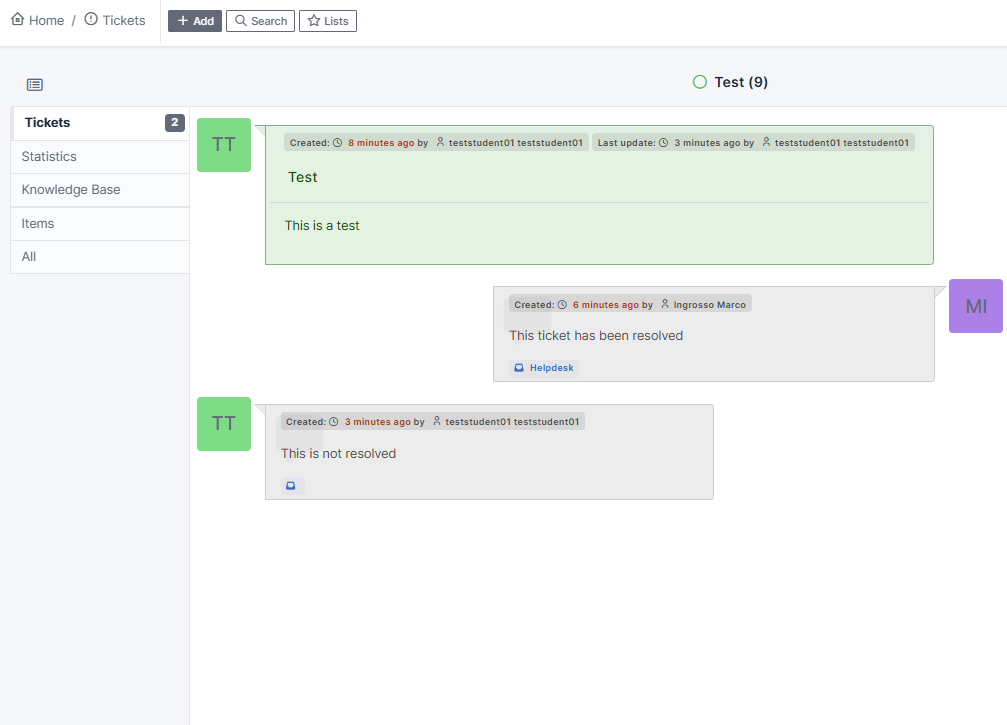
How to check your tickets and state of progress
To check the status of your tickets click on the ticket tab as shown below:
You will be taken into the following page:
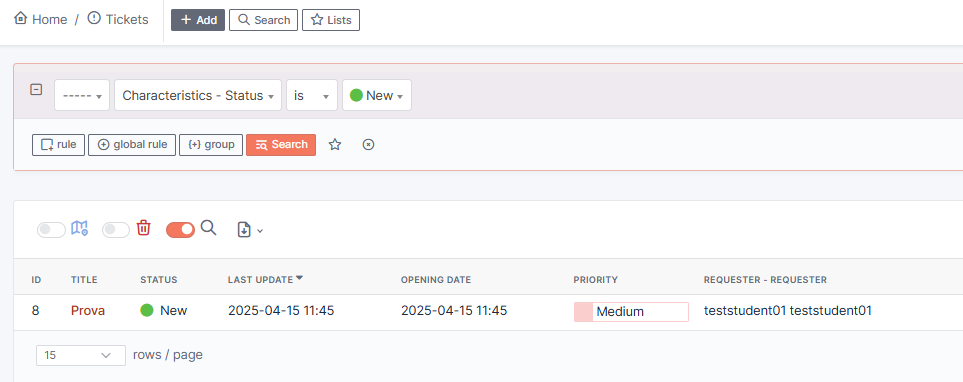
Click on the title to have a complete overview of the ticket

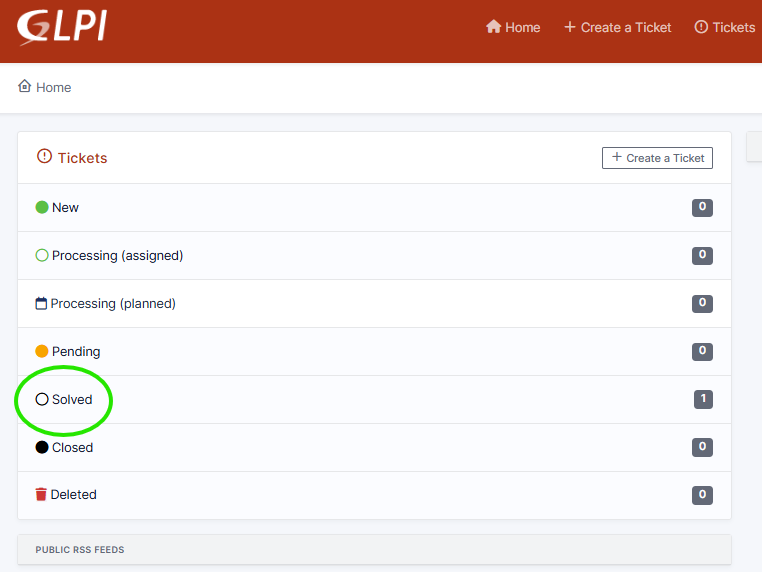
Once your ticket has been resolved, you will find your tickets under the solved tab, with a description of the resolution.
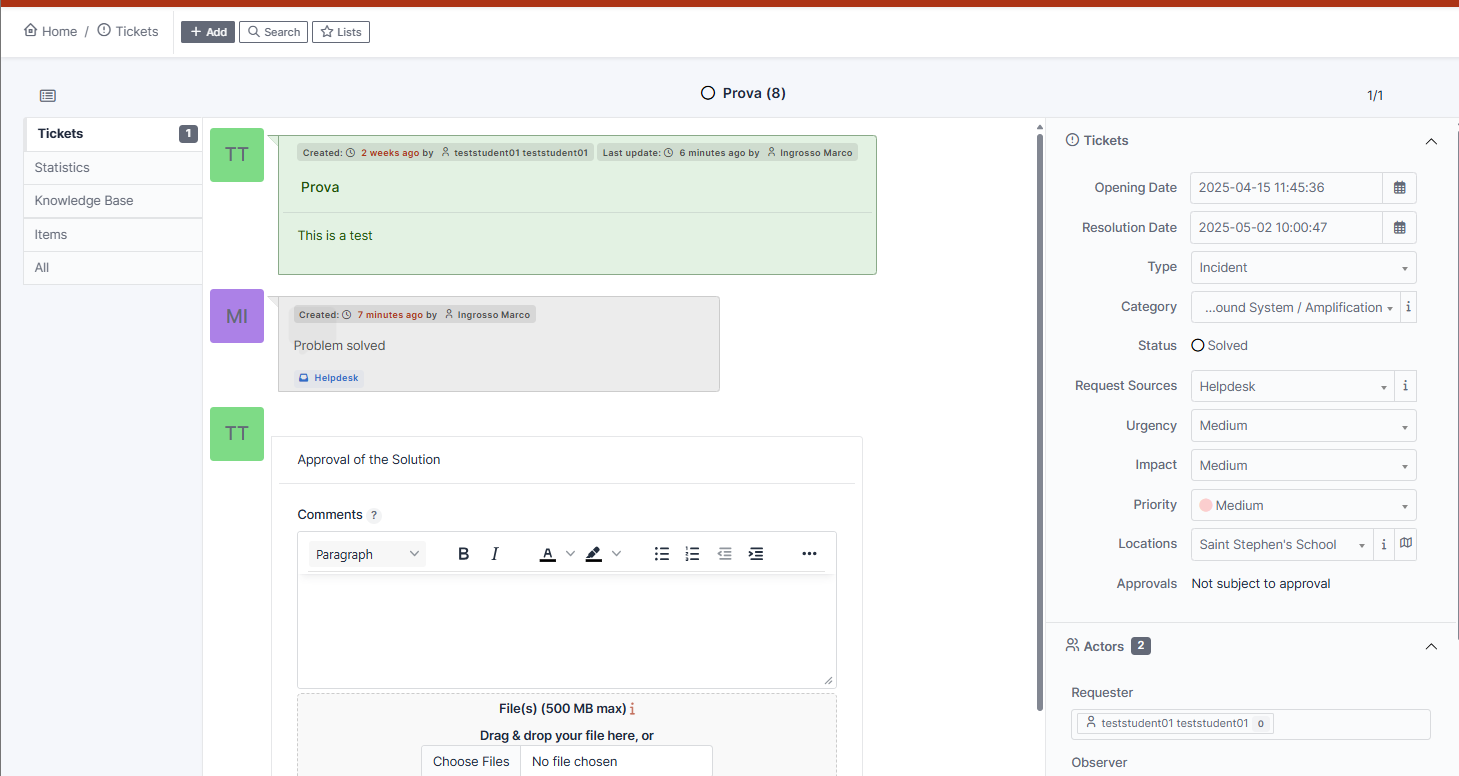
Finally, choose whether accept or refuse the solution.
Accepting will close the ticket and move it the "Closed" tab.
If you Refuse, you must provide a description of the ongoing problem and the ticket will be moved to "Progressing - assigned"
Benefits of IT Helpdesk Tickets
These are some of the Benefits of using on IT Tickets:
- 1. One of the main benefits of using IT tickets is that they provide a centralized system for tracking and documenting technical issues. This allows IT staff to easily see what issues have been reported and what steps have been taken to resolve them. This can help to prevent duplication of effort and ensure that all issues are addressed in a timely manner.
- 2. IT tickets is that they allow for clear communication between IT staff and users. This is especially important in large organizations where there may be many different people responsible for different aspects of the IT infrastructure. IT tickets allow users to provide detailed information about the problem they are experiencing and for IT staff to respond with clear instructions on how to resolve the issue.
- 3. IT tickets also help to ensure that all issues are handled in a consistent manner. This is especially important for IT staff who may be working remotely or on different shifts. By using IT tickets, IT staff can see what actions were taken to resolve a problem, and can use this information to troubleshoot similar issues in the future
- 4. IT tickets also help to improve the overall efficiency of the IT department. By using IT tickets, IT staff can prioritize their workload and ensure that the most critical issues are addressed first. This can help to minimize downtime and ensure that users have access to the resources they need to do their work.